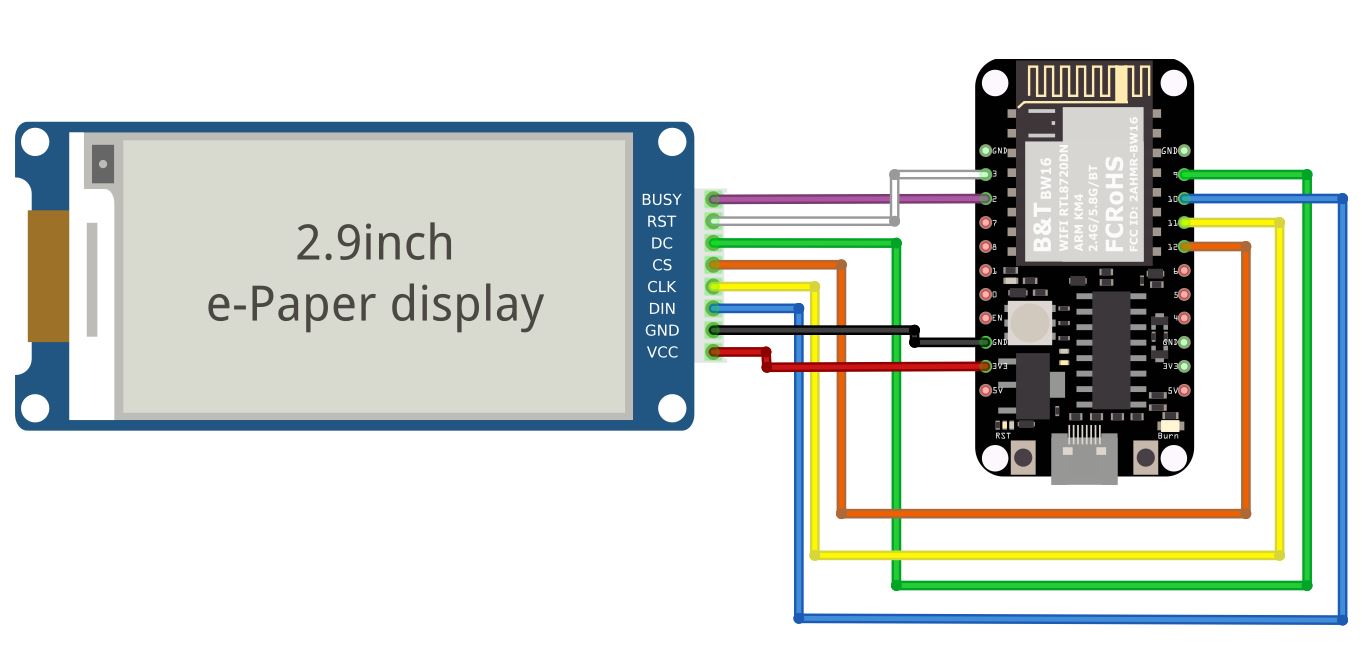
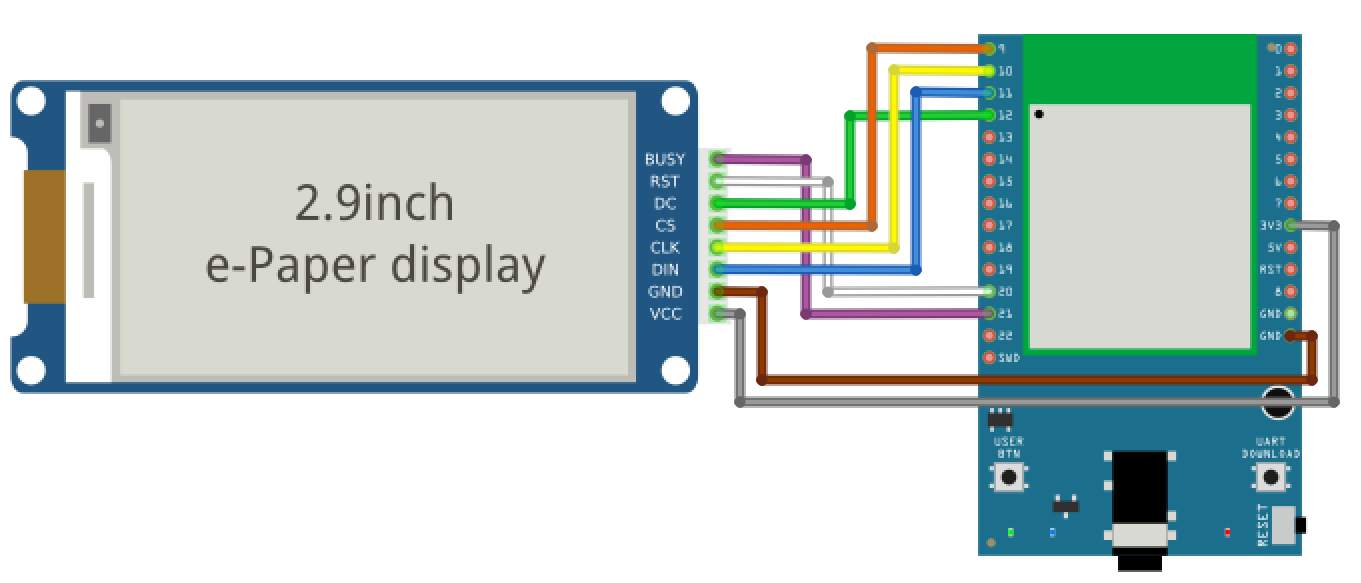
Paper Display Circuit Diagram Figure 2.1. E Ink Display Extension Board with Connected 2.9" Display This application note makes use of the E Ink EPD extension board to illustrate how to drive an e-paper display with an EFR32 micro-controller. The EPD extension board is available for sale with the HULK Driving Board and the full schematics and documentation refer-
E-paper has revolutionised certain applications like e-readers and digital signage due to these characteristics, providing a digital yet natural reading and viewing experience. Interfacing 1.54" ePaper Display with Arduino. For interfacing the 1.54" ePaper Display with Arduino, follow the connections as per the circuit diagram below. This video shows you how to connect a 1.54" ePaper display to your Arduino! Perfect for e-readers, portable projects, and more.Full Tutorial: https://compone
PDF AN0063: Driving Electronic Paper Displays (E Circuit Diagram
Here are two project code examples for the Arduino E-Paper display interfacing using the GxEPD2 library. In the first example, we'll display 3 lines of text messages on the E-Paper display (each line is center-aligned on the screen). In the second example, we'll display a small bitmap image on the E-Paper display. E-Paper Display Text Code
Do you want to learn how to use an ePaper (E-Ink) display with Arduino, ESP8266 or ESP32? This video is for you.Sponsored by PCBWay - Full feature custom PCB

Digital Clock on e Circuit Diagram
Waveshare e-paper display for Raspberry Pi Pico. I have used a black/white 3.7 inch e-paper display. Raspberry Pi Pico microcontroller. Either with presoldered headers or you will have to solder them yourself. I have used a Pico without wireless connectivity. Micro-USB cable to connect the Pico to a computer. For showing custom images on the e-paper display we are going to use a software called Image2LCD which will help us translate a monochrome bitmap image into a C array that we can store in the Arduino program memory. Use the link above to download and extract the software and then follow the step by step instruction from my video to finalize this step.